Of lately I have come to adore paper crafts. They are beautiful, vibrant colors, flexible because you can use them just about anywhere, and most importantly cheap. With just a few things you can whip up the most elegant, beautiful art pieces.
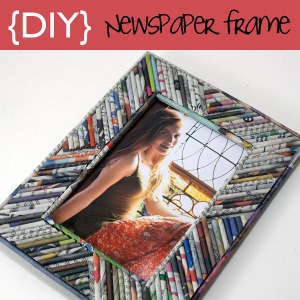
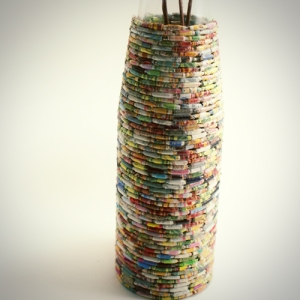
At the end of this post, I am going to show you some of the more beautiful paper craft pieces I have come across.
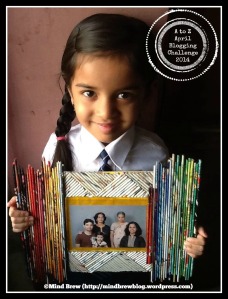
This particular frame was made for my daughter’s school’s Craft Bandwagon. While all the other crafts have been returned, this is one of the few crafts that will remain in the school forever.
Things I used:
-
An old cake board
-
old magazines
-
a bamboo skewer (or anything else that is thin and long for rolling
-
a glue stick
-
PVC glue
-
Chart paper
-
Clear plastic cover from an old frame
-
ribbons and duct tape
-
clear varnish and a flat brush


Cool ideas! I especially liked the newspaper frame and those paper bead bobby pins! ♥
watch out for my J post Kathy 🙂
Wow… so adorable. I love photo frames an I have some kind of fetish towards it 😛 😛 This is a col idea. I ll try this one!!!! 🙂
Thanks Shalini!!!
This is beautiful. My SIL makes similar craft pieces, and I know how tedious the process is of making these thin – even strips. The frame looks beautiful and I despite my liking I lack the patience to make such fine pieces of art 🙂
Thanks OHW 🙂
So very cool, Gauri! You’re doing a fab job of this challenge. Good to see you’re staying with it. 🙂
Thanks Corinne! And yes, I am back to reading and commenting too! 🙂
This is very nice, Gauri! I really like the look of this frame. Like I said before, I am not crafty at all, but I very much admire those who can do these amazing things with recycled, reused things. I like to support these efforts by purchasing their products whenever I can… Close to where I live there is a very nice project called Wellpaper – I have bought several things made by them, this is also a project using old newspapers etc for making beautiful products. You may already know about it- http://www.wellpaper.org/
Well, again a very good post, Gauri! And glad you are continuing with the challenge:)
Beauty Interprets, Expresses, Manifests the Eternal
their site is not working Beloo, I couldn’t see any products. and thank you so so much! 🙂
Wow, you are creative and I am just shuddering to think what will happen to me when my daughter starts going to school and she will ask me for ideas for her craft projects 🙂 Loved the magazine vase too 🙂
just keep my blog in mind Prasanna and you will have lots of ideas 🙂 thanks for visiting 🙂
Fabulous ideas! I am sharing this link with my sister who loves making such crafty things. I can only admire and appreciate the creativity and the patience involved! Loved the vase too! You are very talented, Gauri! ♥
Thanks Shilpa 🙂
Glad to see you back on posting mode, Gauri 🙂 This looks so trendy and with all re-used stuff! Very nice indeed!
*Shailaja*
A to Z Challenge, 2014/ UBC, April 2014
Well whaddya know? I couldn’t stay away and miss being in touch with all you wonderful bloggers! 🙂
Gauri, I cannot be more awed by your creative skill. Too good. Loved it totally!
Thanks Ghata! 🙂
I have always envied creative, artistic types as I have NONE. This was very well explained.
Thanks Carol 🙂
Great post! n glad to see you back n about!
thanks Danny! It was because of all the support from you guys 🙂
Loved the newspaper frames…You are so creative Gauri!
Random Thoughts Naba
thanks Naba 🙂
I have previously tried the newspaper roll frames and bobby pins!!! Will share pics sometime!! Nice one 🙂
~S(t)ri
Participant|AtoZ Challenge 2014
Smile, it makes (y)our day!
cool! Share the pics with me please 🙂
Gauri, I love doing this. I remember several years ago, when we didn’t have sticks, my Mom suggested rolling newspaper just like this -except i used a pencil :). Once rolled, the “stick” becomes incredibly strong!
Great stuff!
Love,
Vidya
Thanks Vidya! I know the sticks are really strong indeed, and when reinforced with varnish they become even harder 🙂
Hey what a pleasant surprise to have you back. Loved loved the ideas. Once I made a pen stand with rolled up newspapers.. still remember it.
OK I am definitely trying this with S….if i get him to sit in a place for more than five minutes 🙂
Fabulous!! I loved your design of photoframe 🙂 … I had made a similar one sometime back
http://destinychildosheen.blogspot.com.au/2013/02/easy-to-make-handmade-photoframes.html
So creative. Loved it Gau. Will try the frame and will also do the pot. 🙂
Thanks love 🙂
Creative and money saving too!
Great DIY! I used to do a lot of paper crafts with sis when younger. I have a frame too done with paper mache! 🙂 love the look of the vase!
The vase is oo pretty! ANd I am going to try it too 😀
Richa
cool 🙂 Share it with me when you do 🙂
Talented lady, your DIY projects are amazing 🙂 Glad to see your post and happy that all is well at your place 🙂
ttp://sulekharawat.com/2014/04/07/frantic-story/
Thanks Sulekha 🙂
This is so awesome. It looks so pretty. I am going to try this, but, with a mirror in centre. 🙂
Super cool ideas Gauri !! Loved this one 🙂
Thanks Jyotsna! 🙂
Hey thats something I should try making ! Thanks 🙂
coolio! 🙂
Such cool and fun ideals. I would like to do something like this with my son.
thanks Glenda 🙂
I really loved the paper photo frame and the vase. Glad to have dropped in here. Good luck with your challenge. 🙂
Thanks Rekha 🙂
Another fun project to do. And it looks simple enough. 🙂
Nice! And, your daughter is so cute looking!!
thanks Roshni 🙂
Lovely! My mother in law had made a newspaper holder like this long ago. .. She cut a Kellogs cornflakes box to shape and stuck all over it, these paper rolls just like you have done! I wondered then and I wonder now, solid patience n dedication man! 👍👍👍 No wonder your little one is beaming! 🙂
Good luck with the challenge! 🙂
yeah it did take me some time, but anything is worth if your kids are happy, right?
Pingback: A to Z April Blogging Challenge 2014 All Posts | Mind Brew